2023's Top DIY Outdoor Decor Projects: Unleash Your Creativity with 10 Trendy and Fun Ideas

Table of contents
- Metal Candle Lanterns
- Vertical Pallet Garden
- DIY Birdhouses
- Mosaic Stepping Stones
- Outdoor Movie Screen
- Conclusion
As we embrace the year 2023, outdoor living spaces are increasingly becoming a focal point for homeowners looking to create a haven for relaxation, socializing, and connecting with nature. With many people spending more time at home, the desire for beautiful, functional, and welcoming outdoor spaces has grown, inspiring a new wave of creative DIY outdoor decor projects. Whether it's a cozy patio, a spacious backyard, or a lush garden, homeowners are looking for ways to express their personality and style through their outdoor spaces, while also staying on-trend and budget-friendly.
In recent years, we've seen a significant shift towards eco-friendly and sustainable design, with many people seeking out ways to upcycle and repurpose materials to minimize their environmental footprint. Additionally, the popularity of customizable and unique outdoor decor has surged, as homeowners search for ways to make their spaces stand out from the crowd. From vibrant colors and patterns to versatile and multi-functional pieces, outdoor decor trends in 2023 are all about showcasing creativity and embracing individuality.
In this article, we will explore some of the top DIY outdoor decor projects for 2023, with an emphasis on trendy, fun, and budget-conscious ideas that will appeal to a wide range of tastes and preferences. From elegant metal candle lanterns that cast a warm and inviting glow to upcycled planters that breathe new life into discarded materials, these projects will inspire you to tap into your creativity and transform your outdoor space into a personalized oasis that reflects your unique style and vision.
With each project, we'll provide tips and suggestions on how to customize the design to suit your specific needs and aesthetic, as well as guidance on the materials and tools required to bring your vision to life. So, whether you're a seasoned DIY enthusiast or a beginner looking to dip your toes into the world of outdoor decor, this article will provide you with a wealth of inspiration and practical advice to help you create a stunning and memorable outdoor space that you'll be proud to show off to friends, family, and neighbors.
- Metal Candle Lanterns
Candle lanterns have long been a popular addition to outdoor spaces, providing a sense of warmth, elegance, and charm. However, 2023 has seen a surge in the popularity of exotic colorful metal candle lanterns, as homeowners seek to add a touch of global-inspired flair to their gardens, patios, and backyards. These unique and eye-catching lanterns not only cast a warm and inviting glow, but they also serve as a conversation-starting focal point for your outdoor decor.
Creating your own exotic colorful metal candle lanterns is a fun and affordable way to embrace this trend, while also allowing you to fully customize the design to match your personal style and preferences. To begin, gather a few simple materials, such as metal sheets, metal shears, a drill, and candles or LED lights. Consider using colored or patterned metal sheets to create a vibrant and visually appealing lantern design.
Start by cutting the metal sheets into the desired shapes and sizes for your lanterns. This could include traditional square or rectangular lanterns, or more unconventional shapes such as hexagons, octagons, or even intricate Moroccan-inspired designs. Use metal shears or a jigsaw with a metal cutting blade to achieve precise and clean cuts.
Next, create patterns on the metal sheets by either cutting out shapes, such as stars, flowers, or geometric designs, or by using a metal punch to create small holes in a decorative arrangement. These patterns will not only add visual interest to your exotic colorful metal candle lanterns but will also allow the light to shine through, casting intricate shadows that dance against the night sky.
Once you've completed the cutting and patterning, assemble the lanterns by connecting the metal pieces using metal brackets, screws, or even metal wire. Be sure to leave an opening or a hinged door to allow for easy access to the candle or light source. To further enhance the exotic colorful metal candle lanterns' visual appeal, consider adding embellishments such as beads, tassels, or small metal charms.
Finally, add your choice of candles or LED lights to the lanterns. While traditional candles offer a warm and flickering glow, LED lights provide a safer and more energy-efficient option, especially if you plan to leave the lanterns unattended for extended periods.
When displaying your exotic colorful metal candle lanterns, consider hanging them from tree branches, pergolas, or shepherd's hooks, or placing them on tables, steps, or along pathways. You can also create a stunning centerpiece by grouping lanterns of varying sizes, shapes, and colors together. The possibilities are endless, and your custom-designed lanterns will not only provide a cozy ambiance but will also add a touch of global sophistication to your outdoor space.
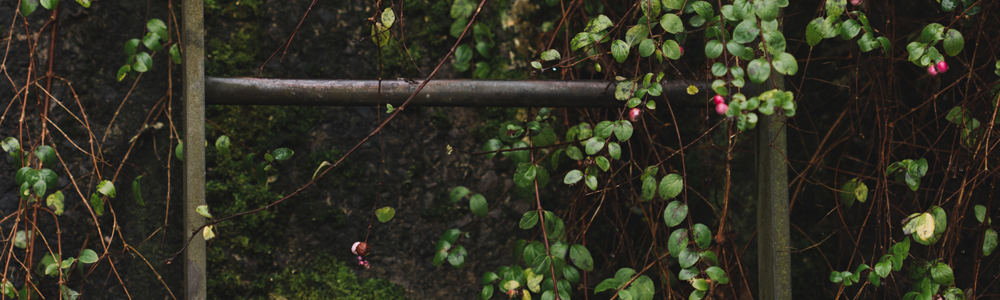
- Vertical Pallet Garden
The vertical pallet garden has emerged as a popular and space-saving outdoor decor trend in recent years, particularly for those with limited outdoor space or who want to make the most of a small patio or balcony. This innovative and eco-friendly gardening solution not only allows you to grow a variety of plants, herbs, and flowers in a compact area but also adds a visually appealing and rustic charm to your outdoor space.
Creating your own vertical pallet garden is a relatively simple and cost-effective project that can be tailored to your specific needs and design preferences. Here's a more detailed guide to help you create a stunning and functional vertical pallet garden:
-
Choose and prepare the pallet: Start by sourcing a wooden pallet that is in good condition and free of any harmful chemicals or pests. Pallets can often be found at local warehouses, garden centers, or hardware stores, sometimes for free or at a low cost. Once you have your pallet, sand down any rough edges and apply a coat of paint or wood stain, if desired, to match your outdoor decor.
-
Attach landscaping fabric: To create pockets for the soil and plants, attach landscaping fabric to the back, sides, and bottom of the pallet. Use a staple gun to secure the fabric tightly, ensuring that there are no gaps where soil could escape. It's important to choose a high-quality and durable landscaping fabric that will withstand the weight of the soil and plants, as well as resist moisture and exposure to the elements.
-
Add soil and plants: Once the fabric is securely attached, lay the pallet flat on the ground and fill each pocket with a high-quality potting mix. Choose plants that are well-suited to the vertical growing environment, such as herbs, trailing flowers, succulents, or small vegetables. Carefully tuck the plants into each pocket, ensuring that their roots are firmly embedded in the soil. It's a good idea to leave the pallet flat for a few days to allow the plants to establish and take root before moving on to the next step.
-
Secure and mount the pallet: Before standing the pallet vertically, make sure it is stable and secure. You may need to add additional support to the back of the pallet, such as wooden braces or brackets. Once you're confident in the pallet's stability, choose a suitable location for your vertical garden. This could be against a wall, fence, or even a freestanding structure like a pergola. Ensure the chosen spot receives the appropriate amount of sunlight for your selected plants.
-
Provide support and care: Depending on the weight of your pallet garden and the surface it's resting against, you may need to secure it to the wall or fence using brackets or hooks. Once your pallet garden is in place, water the plants regularly and monitor their growth. You may need to adjust the positioning or add extra support as the plants grow and become more established.
By following these steps, you'll create a beautiful and functional vertical pallet garden that adds a touch of greenery and rustic charm to your outdoor space. The versatility of this project means you can customize the size, color, and plant selection to suit your unique tastes and preferences, ensuring a truly personalized and eye-catching garden feature.
- Upcycled Tire Planters
Repurpose old tires into unique and eco-friendly planters that will add a touch of whimsy to your garden. Clean the tires and paint them in bright colors or patterns that complement your outdoor decor. Once dry, fill the tires with soil and plant your favorite flowers or greenery. These upcycled tire planters can be placed on the ground, hung on fences, or even stacked to create a tiered display.
- Outdoor String Art
Put a creative spin on traditional outdoor wall art with a DIY string art project. All you need is a wooden board, nails, a hammer, and colorful string or yarn. Start by sketching out a design on the board – this could be a word, a shape, or an abstract pattern. Hammer the nails along the outline of your design, and then wrap the string around the nails to create your desired pattern. This unique and colorful art piece can be hung on a fence, a wall, or even displayed on an easel to add a touch of creativity to your outdoor space.
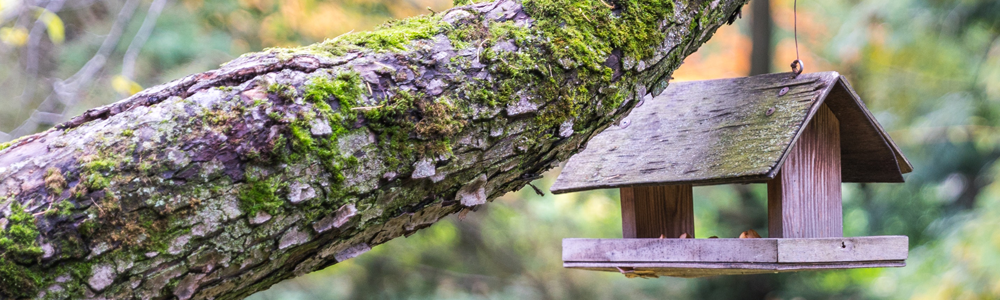
- DIY Birdhouses
Birdhouses are a timeless and charming addition to any outdoor space, providing a safe and cozy refuge for your feathered friends while also adding an element of whimsy and natural beauty to your garden or patio. In 2023, DIY birdhouses continue to be a popular outdoor decor project, with homeowners embracing the opportunity to create unique and personalized designs that reflect their style and interests.
Crafting your own birdhouse allows you to explore your creativity and customize the design to suit your outdoor space, while also supporting local bird populations and contributing to a healthy ecosystem. Here's a more detailed guide to help you create a one-of-a-kind birdhouse that will delight both your feathered visitors and your human guests:
-
Select the appropriate materials: Choose materials that are durable and can withstand the elements, such as untreated wood, reclaimed lumber, or even upcycled materials like metal or PVC. Avoid using materials that have been treated with chemicals or paints that could be harmful to birds. Ensure the materials you select are appropriate for the size and type of birdhouse you plan to create.
-
Plan your design: When designing your birdhouse, consider the types of birds that are native to your area and their specific nesting requirements. Different bird species require different sizes of entrance holes and interior dimensions, so be sure to research the needs of your local bird population. Additionally, think about the overall style and aesthetic you want to achieve, whether it's a rustic, traditional design or a more modern, minimalist look.
-
Cut and assemble the pieces: Once you have your design planned, cut the materials to the appropriate sizes and shapes. Pre-drill holes for any screws or nails you'll be using to assemble the birdhouse, and sand any rough edges to create a smooth, safe surface for the birds. Assemble the birdhouse according to your design, ensuring that all joints are secure and stable.
-
Add ventilation and drainage: Proper ventilation and drainage are essential for a healthy and comfortable birdhouse. Drill small holes near the top of the birdhouse to allow for air circulation, and drill slightly larger holes in the bottom to provide drainage in case of rain. Be sure to place the ventilation holes in a way that won't allow rain to enter the birdhouse.
-
Customize and decorate: Now comes the fun part - decorating and customizing your birdhouse! You can paint or stain the exterior of the birdhouse, but be sure to use non-toxic paints or stains to ensure the safety of your bird visitors. Add decorative elements, such as wood carvings, stencils, or even repurposed items like old door knobs or drawer pulls. This is your opportunity to let your creativity shine and create a truly unique and eye-catching birdhouse.
-
Mount and maintain: Once your birdhouse is complete, find a suitable location to mount it, ideally on a sturdy post, tree, or fence at least 5-10 feet off the ground to keep it safe from predators. Regularly clean and maintain your birdhouse to ensure it remains a safe and welcoming home for your feathered friends.
By following these steps and incorporating your own unique design elements, you'll create a charming and functional DIY birdhouse that not only adds character to your outdoor space but also supports local wildlife and fosters a thriving ecosystem.
- Mosaic Stepping Stones
Add a pop of color and creativity to your garden path with DIY mosaic stepping stones. Create your own mosaic patterns using broken tiles, glass, or even sea shells. Arrange the pieces on a stepping stone base, such as a pre-made concrete stone or a circular wooden board, and secure them with a layer of adhesive. Once dry, fill the gaps between the mosaic pieces with grout, and then seal the entire surface to protect it from the elements. These one-of-a-kind stepping stones will not only add visual interest to your outdoor space, but they'll also guide your guests along your garden paths.
- Hanging Bottle Garden
Embrace the eco-friendly trend by upcycling used plastic bottles into a hanging bottle garden. Cut the bottoms off the bottles and string them together with twine or rope. Fill the bottles with soil and plant your favorite herbs, flowers, or succulents. Hang the bottle garden from a pergola, tree branch, or even the side of your house to create a stunning vertical garden that saves space and helps the environment.
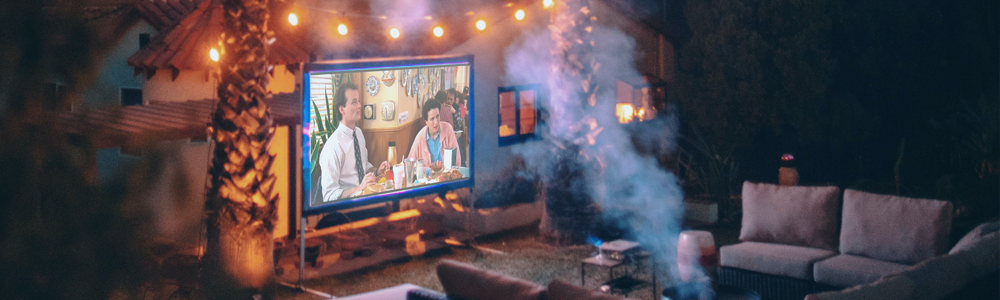
- Outdoor Movie Screen
Transform your backyard into the ultimate entertainment destination with a DIY outdoor movie screen. Simply attach a large, white sheet or canvas to a sturdy wooden frame, and you'll have a perfect screen for projecting your favorite films. Add some comfy seating, cozy blankets, and a popcorn machine, and you'll be ready to host movie nights under the stars all summer long.
- Painted Rock Garden
Unleash your inner artist and create a colorful rock garden by painting rocks in various shapes, sizes, and colors. This imaginative and budget-friendly outdoor decor project not only adds a touch of whimsy and personality to your outdoor space but also serves as a fun and engaging activity for the whole family. Whether you choose to paint the rocks with abstract patterns, inspirational quotes, or even create miniature scenes or characters, the possibilities are limited only by your imagination.
To create your very own vibrant and eye-catching rock garden, follow these simple steps:
-
Gather materials: Begin by collecting an assortment of rocks in various sizes and shapes. You can find rocks in your yard, at a local park, or even purchase them from a garden center or craft store. In addition to the rocks, you'll need acrylic paint, paintbrushes in various sizes, and a clear sealant to protect your painted rocks from the elements.
-
Prepare the rocks: Before painting, it's essential to clean the rocks to ensure the paint adheres properly. Wash the rocks with warm soapy water and use a brush to remove any dirt or debris. Allow the rocks to dry completely before moving on to the next step.
-
Plan your designs: Spend some time brainstorming and sketching out your rock painting ideas. Consider creating a cohesive theme for your rock garden, such as a specific color palette, a collection of inspirational words, or a series of nature-inspired designs. Alternatively, let your creativity run wild and paint each rock with a unique and eclectic design.
-
Paint your rocks: Using acrylic paint, bring your designs to life on each rock. Be sure to use multiple layers of paint if necessary to achieve the desired color intensity and coverage. Allow each layer of paint to dry before applying the next. Don't forget to experiment with different brush sizes and techniques to create a variety of textures and effects.
-
Seal and protect: Once the paint has dried, apply a clear sealant to each rock to protect your designs from fading, chipping, or damage from exposure to the elements. Choose a sealant that is specifically designed for outdoor use and follow the manufacturer's instructions for application and drying times.
-
Arrange and display: Now that your rocks are painted and sealed, it's time to arrange them throughout your garden, along paths, or in flower beds to create a visually stunning and unique rock garden. Consider incorporating other elements, such as plants, sculptures, or garden ornaments, to create a cohesive and balanced design.
-
Maintain and update: Over time, your painted rocks may require some maintenance or touch-ups. Regularly check your rock garden for any signs of wear or damage, and reapply sealant as needed. Additionally, don't be afraid to update your rock garden by adding new painted rocks or rearranging your existing ones to keep your outdoor space fresh and engaging.
By following these steps and allowing your creativity to flow, you'll create a colorful and captivating rock garden that adds a distinctive and personal touch to your outdoor decor. This project not only serves as an opportunity to express your artistic side but also provides a fun and therapeutic activity that can be enjoyed by people of all ages and skill levels.
- DIY Water Feature
Elevate the ambiance of your outdoor space by creating your own water feature. With a few simple materials like a large planter, a water pump, and some decorative stones, you can craft a beautiful and calming fountain. Customize the design with elements like cascading levels or even a small pond to create a serene oasis that will soothe the senses and provide a relaxing focal point in your garden.
Conclusion
In summary, 2023 is an exciting year for DIY enthusiasts looking to elevate their outdoor spaces with trendy, fun, and budget-conscious decor projects. As homeowners continue to invest more time and energy into creating inviting and personalized outdoor spaces, the popularity of DIY projects has soared, offering endless possibilities for customization and creative expression. The projects outlined in this article, from exotic colorful metal candle lanterns to space-saving vertical pallet gardens, provide a wealth of inspiration for transforming your outdoor space into a stunning and memorable oasis that reflects your unique style and vision.
Incorporating eco-friendly and sustainable practices, such as upcycling materials or growing your own plants, is not only a responsible choice but also adds a sense of authenticity and charm to your outdoor decor. By embracing these environmentally conscious trends, you can create a space that not only looks beautiful but also benefits the planet.
Another important aspect of outdoor decor in 2023 is the emphasis on individuality and personal expression. By customizing your projects and incorporating your own design preferences, you can create an outdoor space that truly reflects your personality and sets your space apart from others. This focus on uniqueness and individuality ensures that your outdoor decor will be a conversation starter and a source of pride for years to come.
Finally, it's essential to consider the functionality and versatility of your outdoor decor projects. As outdoor spaces continue to serve as multi-purpose areas for relaxation, socializing, and even working or dining, it's crucial to create an environment that meets your specific needs and requirements. By combining form and function, you can design a space that is both visually appealing and practical, ensuring that you can fully enjoy your outdoor space throughout the year.
Whether you're an experienced DIY enthusiast or a beginner looking for some inspiration, these outdoor decor projects offer a variety of options to suit all skill levels and design preferences. By following the tips and guidance provided in this article, you'll be well on your way to creating a captivating and enjoyable outdoor space that will impress your friends, family, and neighbors, and most importantly, serve as a haven for relaxation and enjoyment for you and your loved ones. So, grab your tools, unleash your creativity, and start transforming your outdoor space today!